Thursday, November 27, 2014

Roasted winter vegetables featuring Cape white turnip

I've lived in Southeastern Massachusetts for 22 years, and I married a man who has lived here his whole life. One of the local treats we both love is the Cape white turnip, a rutabaga sized sweet white turnip that has such a devoted following that they actually have a festival celebrating it in Eastham Massachusetts!
These turnips need much love, and lots of space and time to grow. I don't have room for them in my kitchen garden, but they are available every fall at Four Town Farm in Seekonk, after the first frosts make them sweet.
Here are the ingredients for my roast vegetables- my Delicata squash, onions, garlic, sunchokes and rosemary, as well as a big white turnip from Four Town:


Roasted  with olive oil and salt and pepper in an over that starts at 425 and ends at 475 degrees for about 45 minutes (with several stirrings to get both sides of the turnips brown) they come out like this:

Now that's a plate of vegetables worth lingering over:


Happy Thanksgiving!

Monday, October 13, 2014

Winter squash harvest -- the year of Delicata!

Winter squash are by far the most unpredictable harvest in my kitchen garden. Even though I plant  the same number of Delicata and Butternut squash seedlings each year, in comparable settings and with equally enriched soil, one variety always produces much better than the other. Last year I had only a couple of Delicata fruits, but 8 big Butternuts. 
This fall I harvested 9 Delicata fruits from my one surviving vine-- way more than the average 4 or 5, and just 4 Butternuts from 2 vines. I also tried to grow Acorn and Spaghetti, with little success. Each plant produced just one fruit before succumbing to fungus. 
I'm happy overall, because Delicata squash is a more versatile ingredient. It does not have to be peeled, and it's subtle flavor can be used in many recipes. Butternut is a better keeper, so I'll save it for holiday cooking. 
Here's a picture of the squash harvest, as well as some tomatoes I just brought in to ripen. The tomato plants are still blight-free and we have not had a frost yet, though temps have been as low as 40 degrees.  Our recent spate of rainy days has led to cracks on the tops of some of the fruit, but the rain has been very welcome.


Saturday, September 27, 2014

My #5 annual flower for the kitchen garden --Nasturtium

This choice was easy-- the common garden nasturtium is easy to grow, colorful and edible.
But while researching the history of nasturtiums I did learn an interesting fact. The common name nasturtium comes from the resemblance between the peppery flavor of the leaves of this tropical annual and several kinds of European kitchen garden greens in the cress genus, Nasturtium. Like so many other plants discovered by European explorers it was given a common name based on a feature that reminded the explorer of home --in this case  high tea with cress sandwiches!
The Latin name of the flower know as nasturtium is Tropaelum majus. I've grown them for more than twenty years, in colors from peach through deep red, with foliage with dark tones and variegation, and plant forms from compact to trailing. They germinate easily and early, and grow fast, providing bright flowes and edible foliage by July, continuing through frost. A quick chop back of worn foliage in midsummer can also result in fresh fall growth.
But naturtiums do have needs, and they like to be well fed and well watered. This fall we've had drought and my late nasturtiums have sufferred.
Here are some pics from last fall, when the self-sown nasturtiums of October were exceptional:


Thursday, September 18, 2014

My #4 annual flower for the kitchen garden -- Moonflower

September is a ragged month in the kitchen garden, with most flowers and vegetables past their peak and on the decline. But the mooonflower (Ipomoea alba) is an exception. In September the dark green foliage is unmarked by disease or pests, and multiple white blooms uncurl nightly, releasing their sweet fragrance into the cooling early autumn air.


Like all member of the Ipomoea family, all parts of the plant are poisonous, which accounts for the unchewed leaves. Moonflowers take a long time to bloom from seed, but during the three months of growth that precede flowering the leaves weave their way through my inexpensive wire garden fence and turn it into a solid wall of green. 
Moonflower is not a self seeder here in Massachusetts, since frost usually hits the plants before the seeds are mature, though about one year out of five I am able to collect  a few seeds from the earliest blooms. And in order to be sure of September bloom Moonflower should be started indoors, about 
the same time as tomatoes, which means late March for me.  In fact,  I treat my Mooonflower seedlings just like my tomatoes -- I start, harden off and transplant them into the garden at the same time.
It's a little bit of work compared to some of the prolific self sowers I have already picked for my top five,  but once you've stepped into a September garden full of Moonflowers in bloom, you'll understand why this flower makes the list.


Friday, September 12, 2014

My top five annual flowers - #3, Verbena bonariensis

Yes, the name is a mouthful, but this is a great little plant.  This tough species of Verbena is such a reliable self-seeder that you you plant one Verbena bonariensis, you may never have to plant another. It also winters over given just a bit of shelter from cold hard winds.
And yet it  never seems invasive, because the neat early rosettes of foliage can be easily pulled from places you don't want this willowy, purple flowered butterfly magnet to grow.... though I 'm not sure where you would not want it!
Here's a big patch of bonariensis I let fill in after I pulled my garlic plants in July. The foliage is still clean and green and new flower shoots are sent up every day:


In other parts of the garden I have left just one plant, and I really enjoy the effect of the tall flowers coming up through the vegetable plants, in this case a trellis of Rattlesnake pole beans.


Verbena bonariensis has several characteristics that keep it from being the perfect kitchen garden annual; it is not fragrant nor edible, and as a cut flower tends to shed a lot.
Bur right now, when so many other garden flowers are tired and ragged, the Verbena stands tall and bright.


Saturday, September 6, 2014

Top five annual flowers for the kitchen garden- #2, Cleome

Cleome, also known as 'spider plant', latin name Cleome hassleriana, is an old friend from my first days as a gardener. I was  a lot less attentive to my garden's needs then, and even when I neglected to water or fertilize my Cleome they still thrived and flowered, and produced lots of seeds to save for the next season. Their stately heads of pink, purple and white flowers  still rise above my current garden and provide great nectar targets for hummingbirds and hummingbird moths.
I have not bought Cleome seeds in about 30 years. When the seedling come up too thick I thin them, (the compound foliage makes even small seedlings easy to identify) and they tolerate transplanting on cool moist days. I sometimes select for just one color, but often let them grow mixed.
Because of their spiny stems Cleome are rarely eaten by rabbits, deer or woodchucks, so they can liven up the unfenced parts of the kitchen garden. They also make fine cut flowers when collected early in the day-- rememnber to wear gloves or the spiny stems will hurt you!
They also produce flowering side shoots if the main flower head is removed. The seeds can be dried and stored in the fridge, but I generally just grab a few plants after the first frost and shake the seed heads over any bare patch where I want them to grow the following year.
Here's a pic of late season Cleome flowering behind Sol's doghouse:


Wednesday, September 3, 2014

September 3rd tour of my Bay State Kitchen Garden

Well, the best laid plans... I will get back to my picks for top annual flowers soon, but first here is a September tour video:


Monday, September 1, 2014

Top five annual flowers in my kitchen garden- #1, Bachelor Button

As I sit in my study writing I can hear the welcome sound of rain falling in the night, as well as a chorus of crickets and the Labor Day fireworks at the racetrack nearby.
Summer is coming to an all too fast end, but for many of the annual flowers I grow in my kitchen garden it is peak bloom time. Over the next few nights I'm going to post about my top five kitchen garden annuals.
Here's my criteria to make the list: they must grow easily from seed sown directly into the garden, they must require little maintenance, they must bloom freely over a long time, and they must add both color and texture to the garden.  Other criteria can vary—some of my favorites are edible, some feed birds and butterflies, and some make good cut flowers,  while others are tricky to keep happy in a vase.
Why grow flowers in a vegetable garden at all? Well, the tradition of kitchen gardens is that they are places of beauty and comfort as well as food. Growing flowers among the vegetables also provides food for insects and birds that eat insect pests. And mixing the flowers and food crops makes it hard for those insect pests to find and eat the crops.
I'm going to write about the top five in roughly the order they bloom in my garden. Bachelor Buttons often winter over in sheltered spots, and they grow quickly to flower when sown before the last frost. By late June I have masses of flowers in colors from blue to red, sometimes edged in contrasting tones.  The foliage is a pleasant soft gray-green, and the upright form contrasts nicely with my early greens and peas on their trellis. They are also edible, bloom a long time in big clusters, and can re bloom if the flower heads are cut off  with hedge trimmers. 
Here's a shot of a clump from a small packet of seeds I bought for 20 cents: 


Sunday, August 10, 2014

Free tomato day at work

I harvested all the near ripe tomatoes yesterday, and spread them out on the sideboard in the dining room. They are, going clockwise from the top of the picture:
 Burpees Early Pick (medium sized), Rutgers (large with green shoulders and nice round shape), Patio Princess (perfect little globes about 2-3 inches across),
 Mortgage Lifter (big, funny looking, pink with green edges), two kinds of plums, and Sugar Lump cherry tomatoes:


I am picking all of the tomatoes in the beds next to the fence when just starting to color and ripening them on the sideboard because the woodchucks have already shown an inclination to nip through the fence at ripe fruit-- and only ripe fruit. 

Besides the sideboard tomatoes, I started today with another 30 tomatoes  ripening on a plastic bin lid in the garage. I bagged a dozen of these up and took them to work and gave them away to customers and co-workers.  
I really enjoyed the conversations that went along with sharing my tomatoes. I learned a lot as I handed out the fruits- about the gardens the recipients are currently cultivating,  about family gardens from childhood, and even favorite recipes.  My love of grilled cheese and tomato sandwiches is more common than I dreamed!

Tuesday, July 29, 2014

Picture of the garden in late July

Yeah, no woodchuck nibbling in a week!
Here's a pic of the main garden with Sol on guard:

Saturday, July 12, 2014

2014, year of the woodchuck

I mentioned in last week's post that I am at war with some very clever woodchucks. Let me elaborate!
There have always been woodchuck holes in two locations outside my cedar fenced yard, and just about every year the young chucks make forays into the yard by digging under the fence, and were either dispatched or driven off by Sol, and before him, Caddie and Kenji, my previous basenji's.  Often they would stand and fight instead of running, with the inevitable result a dead woodchuck.
This year the two young chucks decided on a cleverer plan--- long tunnels coming up in the midst of shrubs, sunchokes and even the raspberry patch! From these they make quick runs into nearby plantings, with a hole close by to escape to if discovered by the dog.
I found each hole by searching near each area of destruction. For example-- the pea patch by the sunchokes suddenly looked like this one morning:


The woodchucks had torn down the vines and eaten all of the tender tips. I found the hole neatly hidden in a six foot tall stand of sunchokes, filled it in, and put a cinder block on top:


I have found three holes, including the one by the potatoes that I mentioned in my video. Sol has made this spot his new vantage point for guarding the yard:


I appreciate his effort, but at 12 years old his  best days of woodchuck hunting may be behind him. 
My latest strategy is to put floating row cover over the chuck's recent favorites, including my burgundy beans-- they nipped back the tops a couple of days age.  And to think I spent all winter planning how to deal with bean and cucumber beetles, not woodchucks!  
But I try to keep a sense of humor about this epic battle with the woodchucks, and to enjoy the July bounty of the gardens, especially everything in the tomato family -- including potatoes and peppers. More on those next week.

Thursday, July 3, 2014

Video Tour for July

Here's my latest video tour, recorded yesterday:


Right now it's 89 degrees and we need rain-- I hope we get some on the 4th as Tropical Storm Arthur goes by.  I'll give up playing outside on the holiday for a good soaking!

Friday, June 20, 2014

Red Harvest-- radishes, strawberries and potatoes

Here are some pics from my red harvest -- no, not the book, but the best radishes I have grown in years (the secret is good spacing, I finally realize), lots of strawberries, and the first red potatoes of the season:


And yes, more strawberries!


Monday, May 26, 2014

Planting squash and a snake sighting

I began to put my plans for a better squash season into action last week.  First I built a small structure from plastic tubing and covered it with Remay fabric. Then I planted two 'Tigress' squash seedlings inside, cosy and protected, I hope, from cucumber beetles.


Here's my little hoop house:


And inside before planting:


A view from the other end of the garden:


I've always been very comfortable with snakes, and enjoy meeting them in the garden. They are great eaters of small insects. I found this one under some lumber I moved to hold the Remay in place. I hope it sticks around to eat any cucumber beetles that show up!


Thursday, May 15, 2014

Fighting back -- my plan to have a successful zucchini crop this year

Every season in the garden is a bit different, and I enjoy the challenge of adapting to  the many variables and still producing a good harvest.  Despite my best efforts, every year there is  at least one  easy crop that doesn't produce well.
In 2013 that crop was zucchini.  Not just for me, either, but for everyone I talked to who gardens in the Northeast US.  OK, I know all the jokes about leaving bags of baseball bat sized squash on doorsteps, but most summers I enjoy the exuberant output of my half dozen or so zucchini plants. 
Last year there was no exuberance, and all my zucchini died young,  victims of  fungus and the crowd of nasty little cucumber beetles that transmitted it. 
This year I am fighting back!  I bought two disease resistant varieties, Tigress (I grew this for years, but not last year) and Emerald Delight.  I am also (for the first time) starting all my squash in pots inside. They won't go into the garden until they have at least one set of true leaves. This means that beetles will not consume them before they have a chance to get to a fighting weight.
 I am also going to cover the young plants with a super light spun row cover until they flower, to further protect them from beetles. I'll have to uncover so they can be pollinated, but I hope by then the plants will be big and strong, and able to survive some chewing.  
And finally, I have some Neem spray that may help control the cucumber beetles. I use spray as a last resort- it's expensive, and even organic formulations can kill good insects too, throwing off the predator-prey balance in my garden.
I've also decided to start my winter squashes inside this year. I'm interested to see if this will make a difference in the final total of pounds of squash I store next fall.

Here's a pic of the zucchini seedlings just getting their first true leaves,  and the winter squash (and Brussels sprouts) planted but not yet showing:


Saturday, May 10, 2014

Early harvest dinner ingredients

Here's a pic of last week's pasta ingredients-- fiddleheads, asparagus, last fall's final garlic head, and a sprouted red onion. I made a delicious pasta with sherry butter sauce.
No I did not eat the daffodils! These are a fragrant mini that came with the house-- I put them in a small vase on the kitchen window sill to sniff while cooking.


Monday, May 5, 2014

'so much depends on a black wheelbarrow'-- hardening off tomatoes

Sorry, I could not resist the paraphrase! My old black wheelbarrow has a flat tire and is cracked and leaky, but works great for holding tomato seedlings I am hardening off-- I just wheel it in and out of the garage morning and night. If the forecast holds and there is no sign of frost in the 10 day weather report I will plant on Wednesday.


Saturday, May 3, 2014

May 2 video tour of the garden

Here's the first video tour of the year:


All the crops are a bit later than last year, but spring is definitely here. I f there are no frosts in the forecast for next week I will plant tomatoes.


Saturday, April 26, 2014

My big tomato seedlings, and what to do with them

As I feared, my tomato seedlings started in March are big! Here's a pic:


And here's a comparison between Early Pick, started in March, and Sugar Lump, started 3 weeks ago:


The good news is that by using several strategies, including pinching back the main stem to encourage branching,  blowing on them with a fan to build strong stems, and feeding with dilute fish fertilizer every two weeks,  I am keeping the older seedlings strong and healthy.  I don't  even need to to stake them yet.
Early next week I will start hardening off my biggest tomato plants by carting them in and out of the garage in a wheelbarrow for steadily increasing daily exposure to wind and sun.  There are 3 varieties: Mortgage Lifter, Early Pick, and Rutgers. Around May 5th I will put a few into the garden. I'll either have really early tomatoes or lose them to frost... It will be an interesting experiment.

Thursday, April 17, 2014

Yukon Gold potatoes and the lasagna bed, first asparagus

I was wandering Walmart's garden center about a month ago (I like to browse the garden department of all the big stores every couple of weeks, generally in search of discounted items) when I saw bags of seed potatoes.  It was way too early for our area, but I guess their shipping schedule doesn't acknowledge regional seasonal variations. They were already well sprouted, cheaply priced, and two varieties I don't currently have in my wintered over seed potatoes.  I bought a three pound bag each of Red Norland and Yukon Gold.
When I got home I wrapped the bags in newspaper and put them in the right crisper drawer with my other seed pots. Two weeks later I pulled them all out, laid them on baking trays, and put them on top of the bookcases in the upstairs front bedroom to warm up and sprout a bit more.
On April 9th they went into the ground. I built a 'lasagna bed' of  cardboard, newspaper and compost last fall, and I was pleased to find the soil was rich and full of earthworms this spring when I dug it over for  the potatoes:

Here's a pic of the leggy Yukon Golds that I planted in this bed:


The Red Norland went into a raised bed made of recycled decking material, which held garlic last year. I laid sticks over both beds to keep Sol from sleeping on top of the emerging spuds:


Nearby  I discovered the first asparagus of the year-- and they were purple.  My green asparagus are not showing much, but the purple ones are a bit more precocious:


I'm glad my asparagus has survived it's second winter here in my garden, despite many very cold days  (we were as low as -5) and a bit of snow two nights ago, on April 15th.


Sunday, April 6, 2014

Lots of seedlings.... too soon?

Last year my first set of tomato and pepper seedlings did poorly due to the off brand potting soil I used.
I did a second planting in early May and ended up with a great harvest despite the setback, but I was frustrated by the extra money and energy I had to expend.
This spring I was determined to do better. I bought premium potting soil and new seeds, a mat for bottom heat, and built new shelving to keep the light bulbs closer to the growing young plants.
But I didn't adjust my seed starting schedule to the late spring we've had, and now I have too many big tomato seedlings too soon. They have already been replanted into individual pots (deeper to get more root growth along the buried stem), and they continue to grow apace-- well, actually at too much of a pace!
Here's a pic (yes, there are some Moonflowers too):


So now the challenge is to keep them happy until the last frost, about a month away. I'm going to pinch the leader back on a few seedings to see if I can encourage branching, and I will also start to keep them at cooler temperatures. Finally, I will build a cold frame for them in the garden that will be insulated enough to take some of the bigger plants out for hardening off quite early, by the end of next week.  Just in case I lose some I did start a few more seeds this week.  Maybe next year I'll finally get the timing just right.

Monday, March 24, 2014

Seven signs of spring, in pictures and video


It's been a cold first week of spring, and we still have another snowstorm to get through in the next two days. So I've searched for and found some cheerful signs of spring in my garden:

Four cold frames seeded with hardy spring greens:


Candy onions planted last week:


Snowdrops!


Garlic growing already:


Fiddleheads forming:

Rhubarb:


And Sol dancing and zooming like a puppy (he's 12):


Sunday, March 9, 2014

Daylight savings and planting spinach

There's still snow in the vegetable garden, but I was stubbornly determined to plant my first crop of 2014 today, the first day of daylight savings.  I got home from work, changed into work clothes, and headed into the garden.
It was a sad sight-- full of debris and snow:


 But there were a few clear beds, including the one I had in mind for building my cold frame.
I quickly laid several rows of cinder blocks inside the bed, then lifted the recycled window section of an old door across the top to check the fit. It was fine for spinach-- not a tight seal, but enough to raise the temperature inside a few degrees. That's all I want or need for spinach.


I took the cover off and propped it up beside the bed while I prepped the soil. I mixed up a couple of handfuls of 10-10-10 fertilizer with about an equal amount of  lime (spinach likes a slightly more alkaline soil), then scraped some of last years potting soil off the soil-sicles I popped out of two adjacent planters:


I mixed all of this material into the soil in the bottom of the cold frame. The soil was frozen a couple of inches down, but I was able to make four furrows, then plant  my spinach and tamp down the soil. There was no need to water, since the soil was already moist, and more water will be released as it thaws under  the glass.
Finally I spread a light layer of straw over the top, then re-covered:


That's it- my first crop planted! Now I will monitor it every day, keeping the soil moist, and not too hot.  I hope to have spinach sprouting by April 1.

Thursday, January 16, 2014

Another great winter vegetable: 'Candy' onion

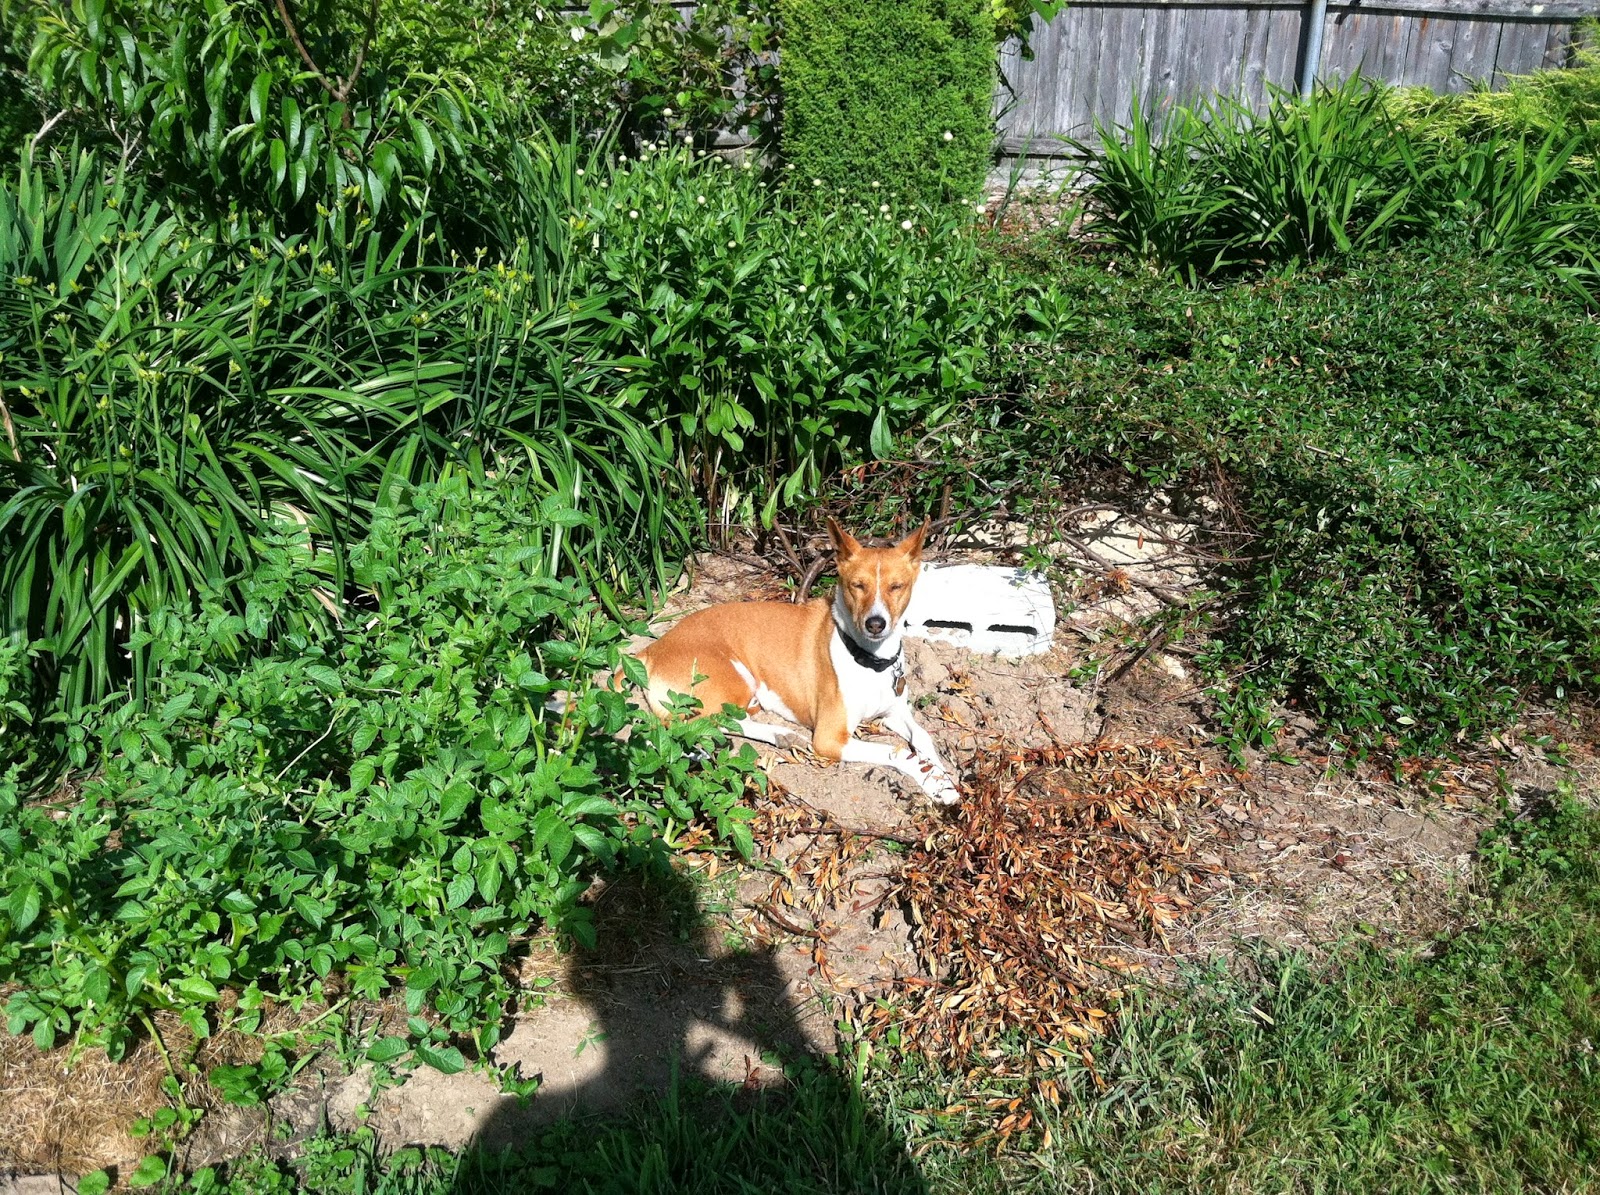
The temperatures  here in Southeastern Massachusetts have fluctuated wildly in the last few weeks, from minus 5.5 degrees in the first couple of days of the year to 60 degrees a week later.   I worried about many things during the lows and highs --  including my oil bill, my pipes freezing, how the Carolina Wren that winters in my garden was faring, and if my onions stored in the garage would freeze.
So how did everything turn out?  Well my oil bill was high, my pipes are ok, I haven't seen the wren yet, and my 'Candy' onions are fine. During the deep freeze I covered them with several layers of old sheets, which was just enough insulation to keep them from freezing. The cold actually did me a favor-- some of the bulbs had started to sprout and it put them back into dormancy.  In a world in which I have so little control over so many things, including the weather, I am disproportionately comforted by the still large stash of home grown onions in the garage.
Why grow onions anyway, since they are so cheap? Well, to get them fresh all summer  (I harvest  about a fifth of my onions young and green) and because they are so easy and fun to grow.
'Candy' is by far the best onion I have grown -- large, flavorful without being too strong, and a good keeper.
 I bought plants, which are more expensive than sets or seeds, but grow much more consistently with less care. Here's a pic of the plants being rehydrated after delivery:


And here they are planted in a well manured raised bed in April:


I mulched them with straw, weeded fairly regularly, and side dressed with fertilizer a couple of times in the next 90 days.
When the tops started to fall over I harvested the crop-- about 120 big onions!


I dried them in the garage for several weeks on a rack:


And moved them to another rack held up off the floor for air flow (to keep them dry):

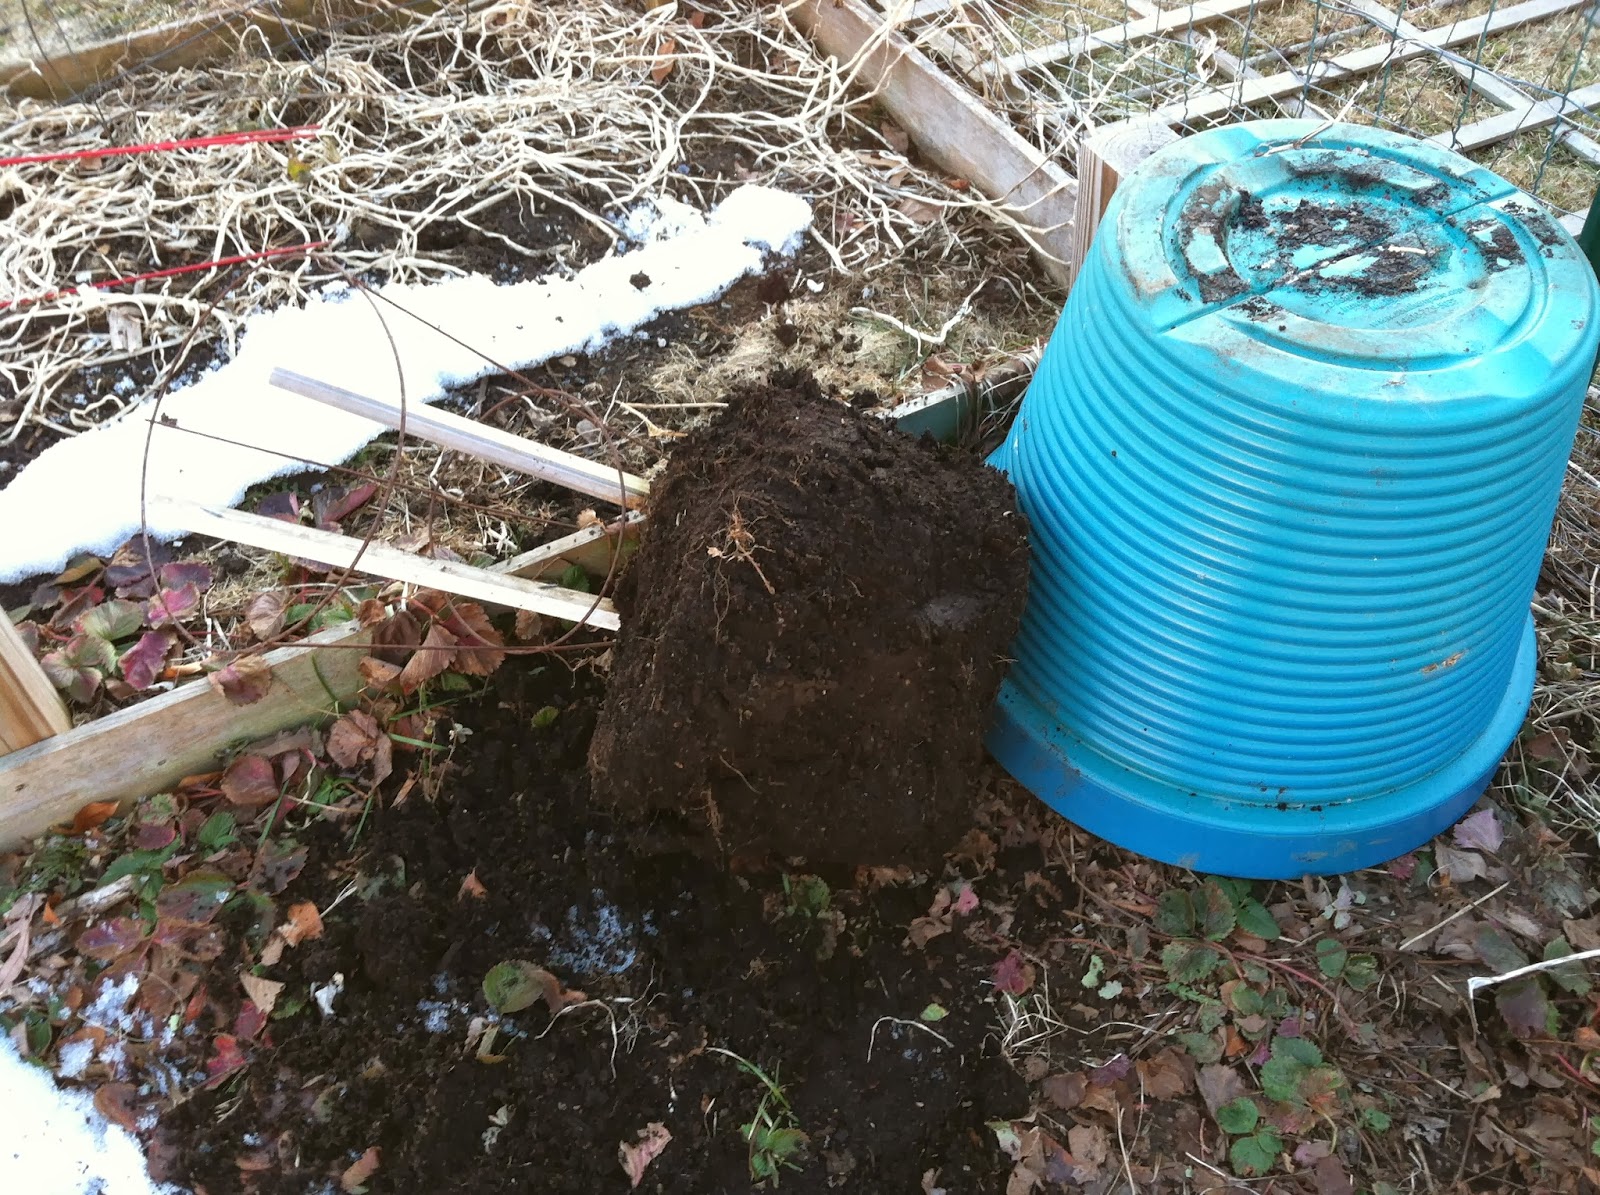
That was in July. Six months later I have eaten many, throw a couple out that sprouted or rotted, and still have this many 'Candy' left to enjoy:


And yes, a small bin of 'Red Zepelin' onions too. I bought the same number of 'Red Zep' plants as 'Candy', but the harvest was much smaller in both  bulb size and number of surviving plants. I really like having both red and yellow onions in my winter storage crops, so I'll try a different red this year. I've already ordered my 'Candy' plants!